Release Notes 7.5
Release Notes 7.5
Navigator for Instructors
What's New
- Markers
Markers are a collection of competencies belonging to a framework, which helps in categorizing and organizing competencies based on specific criteria or standards.
Markers will be defined by the content developers and then instructors can select these markers for their classes to define the competencies for that class. This will simplify the process of creating a class and ensure that the required set of competencies are made available for a class.
When classes are created using markers, the learning journey of the class will be visible to the instructors after students take up study. Furthermore, content for the class will be displayed based on the markers selected. This will eliminate the need for manually assigning a course to the class.
The process for using markers while creating a class, adding students and generation of the learning journey is shown in the video below.
- Tenant Specific: Yes
What's Changed
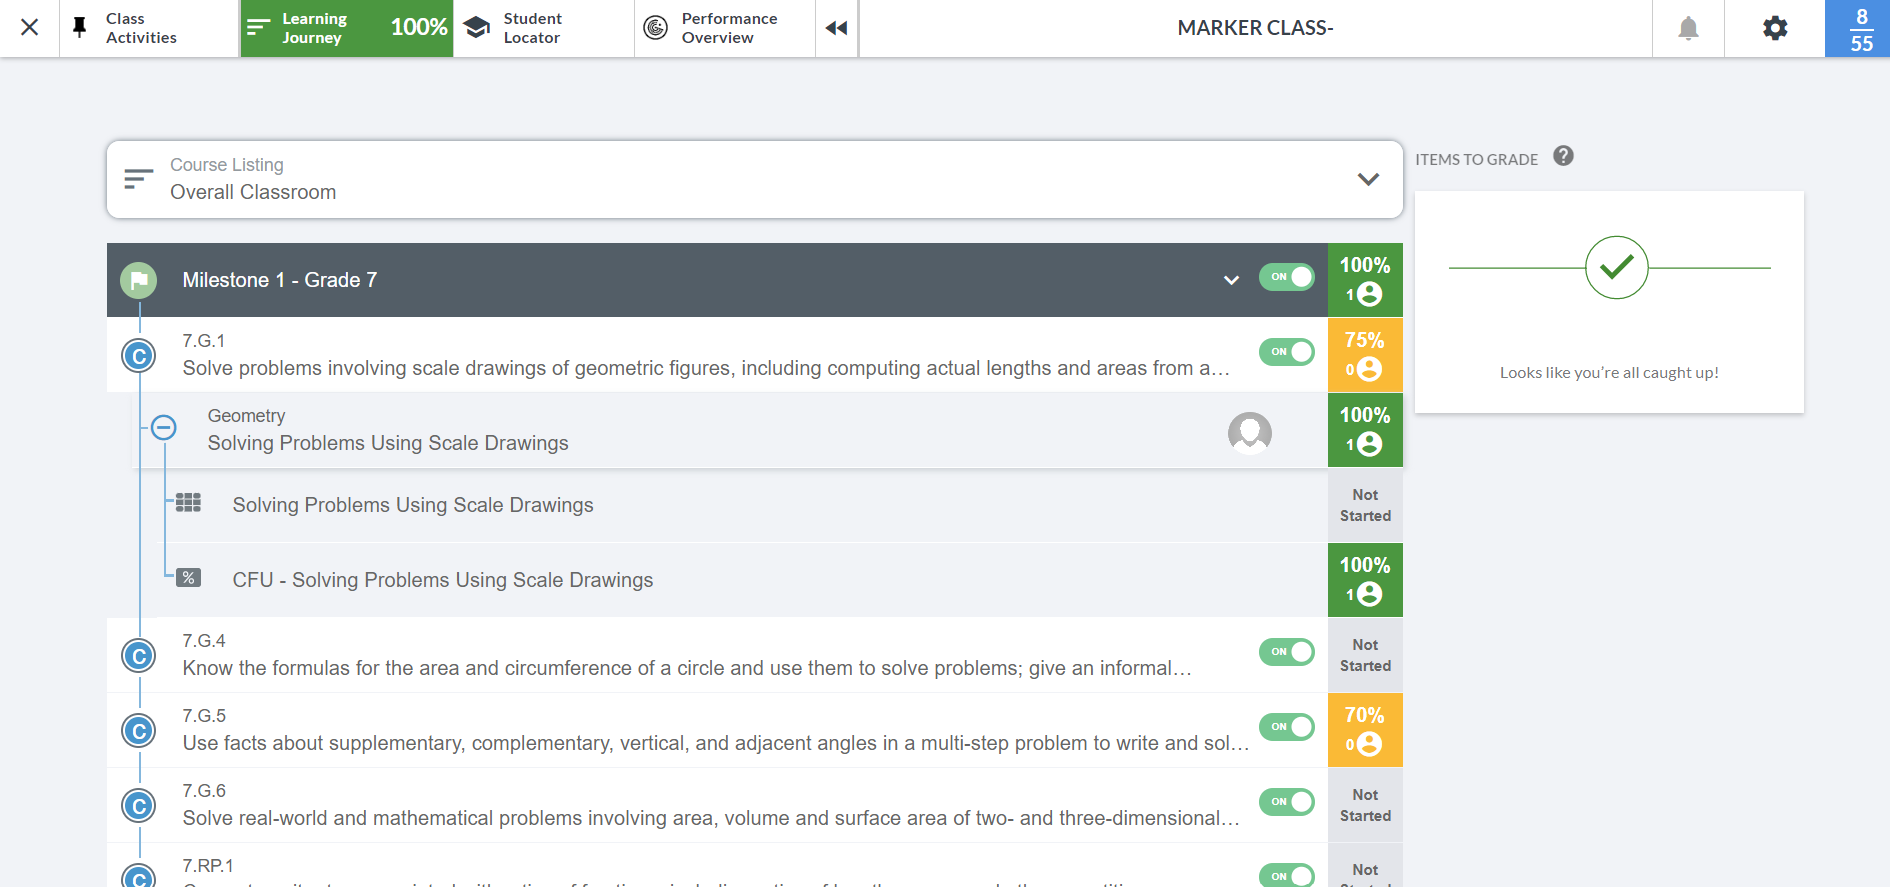
Learning Journey ( For Marker Based Classes):
Instructors can manage and monitor the learning journey of their learners. However, the changes made to the learning journey structure will be visible to instructors only after learners start their learning.
The Milestone view now displays competencies associated with the marker chosen. It can be expanded to view the domain and the collections and assessments within it.
Screenshot
2. Content Visibility ( For Marker Based Classes):
On the class settings page, the default visibility settings for course content will be ON.
Instructors can choose to use the toggle button to switch ON/OFF milestones, lessons, assessments, collections, and Offline Assessments(OA).
The visibility of milestones, collections, assessments, and offline activities will be consistent with the toggled settings. For example, iIf a milestone is turned off, all competencies and the collections and assessments associated within it will also be turned off.
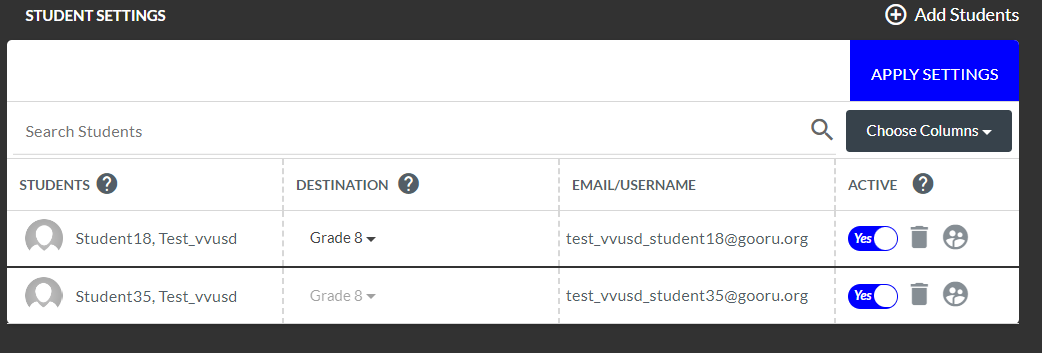
3. Destination Settings ( For Marker Based Classes)
Instructors can set the destination of their learners before they take up study and their milestones are generated.However, once the milestones are generated, the system locks the destination to ensure that the learner continues along the predefined path.
Screenshot
- Tenant Specific: Yes
4. Simplification of tagging process -Course Creation
Tagging content during the course creation process has been made simpler. Now, instead of tagging every level individually, there is an option for inheritance of tagging.This will reduce the need for repeated tagging.
The selection of a framework will occur at the course level. Once a framework is chosen, the collections and assessments within the course will automatically reflect the selected framework. This simplifies the process by avoiding the need to repeatedly select the same framework for each collection or assessment within the course.
When a collection or assessment is tagged with a competency, the resources or questions within them will automatically inherit the competency tagging. This reduces the manual effort required to tag each individual resource or question and ensures consistency throughout the content.
While competencies are inherited, content developers will have the flexibility to select or remove specific micro-competencies for resources or questions. This allows customization and fine-tuning of competencies at a granular level when necessary.
Navigator for Learners
What's Changed
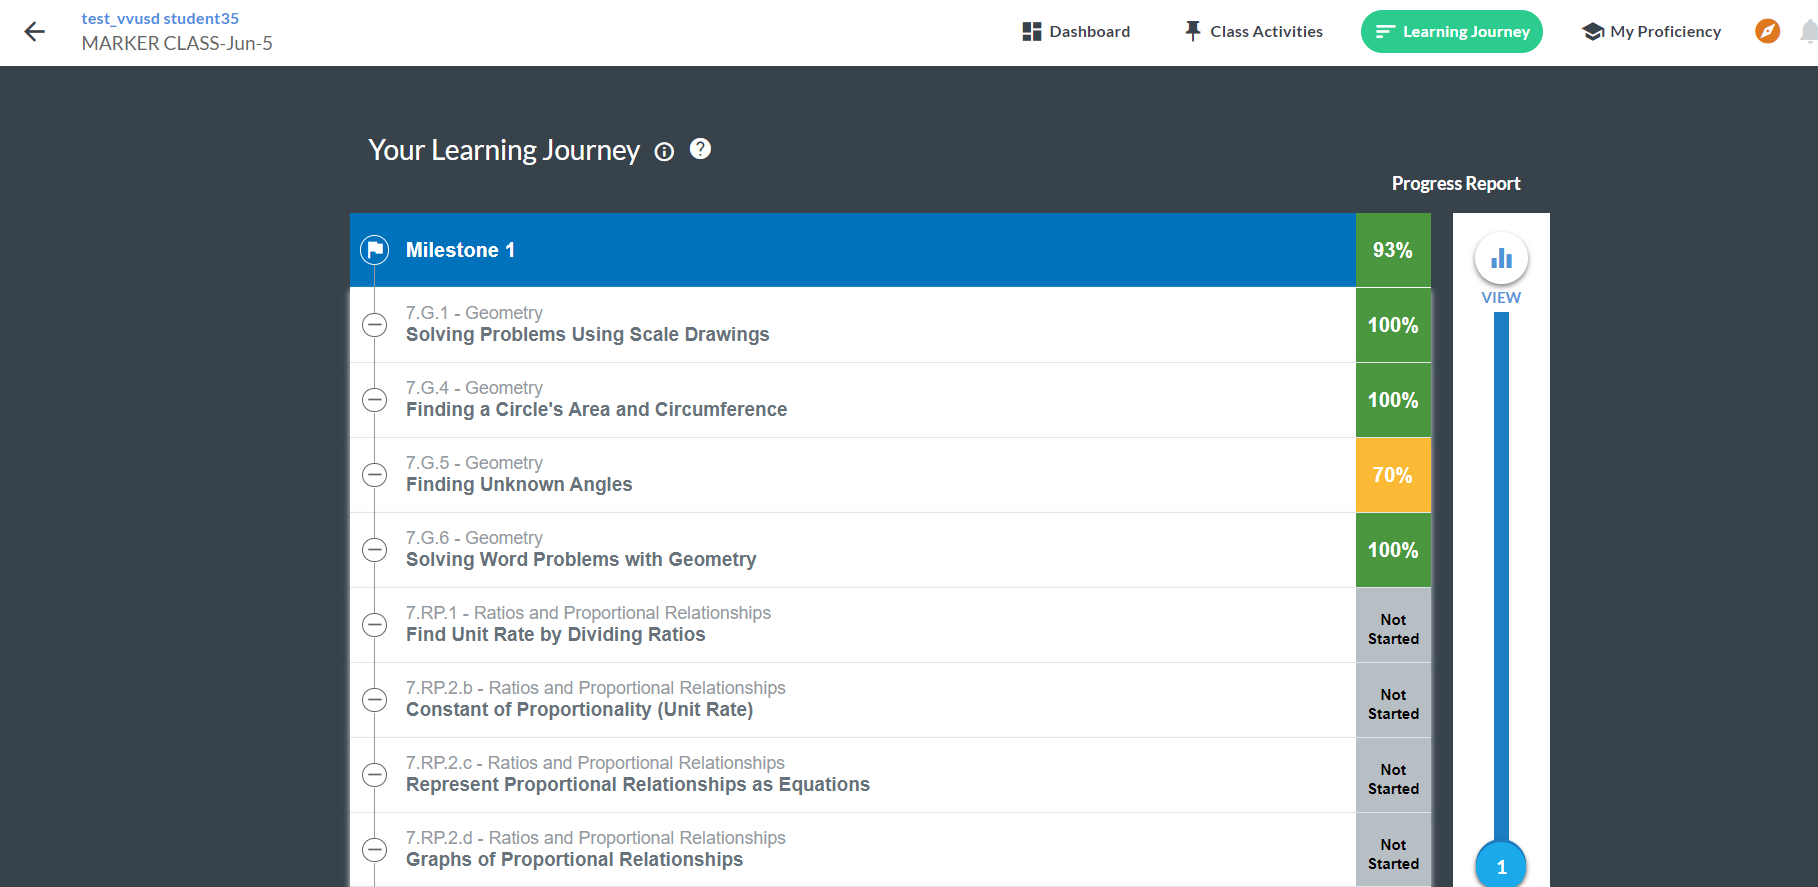
1. Learning Journey View (Marker based class)
The Learning Journey view with respect to marker based classes has been changed. The view now displays the competencies (along with the domains) that are specific to a milestone.
Screenshots
2. Content Visibility
Content visibility for the learner can be controlled by the instructor.
- Tenant Specific: Yes
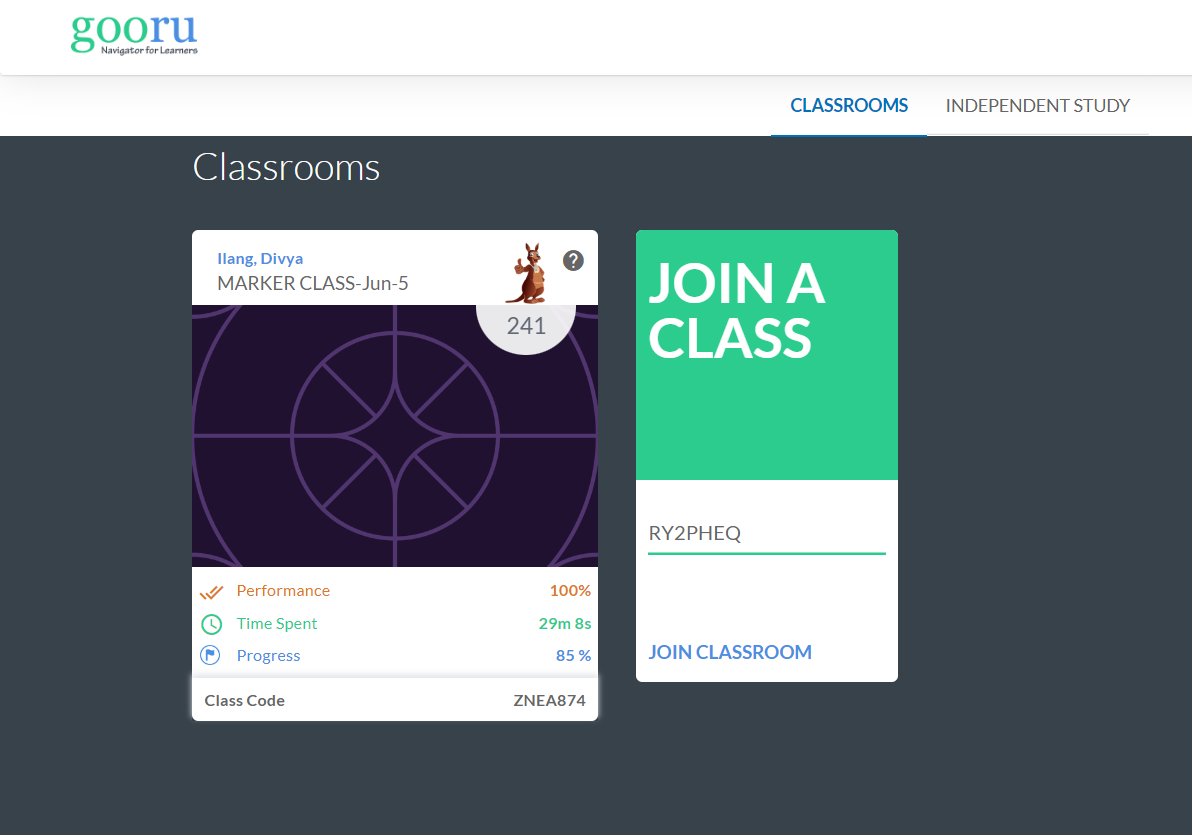
3. Copying Class Codes
Learners can now copy the class code from the class card assigned. To copy the code, double click on the code to select it and copy and paste the code to share with others .


